[Raspberry Pi Zero 2 W] I finally bought one and I'm going to try to make it into an access point.
Overview
I finally bought it [Raspberry Pi Zero 2 W]
I finally got my hands on a Raspberry Pi Zero 2 W.
I knew it was in short supply, but I didn't think the timing would be so wrong.

 スイッチサイエンス
I had been receiving email notifications each time they came in, but I didn't notice or was at work, so I passed them by.
In the meantime, Raspberry Pi5 has been announced.
This one is not yet technically qualified, so we will consider it when the sales timing is determined.
【発売日/価格未定】Raspberry Pi 5 / 8GB — スイッチサイエンス
I want to convert my Raspberry Pi Zero 2 W into an access point while still being able to use Wifi in its normal state.
For the time being, we would like to migrate the simple time-lapse camera built on the old ZERO to the ZERO2.
It simply takes a picture every 20 seconds or so with CRON.
All you have to do is turn it on and leave it alone, and you can easily take interesting time-lapse shots.
I have been using wlan0 to connect to ZERO to check the preview or images, but it was inconvenient to re-configure the settings to connect to my home Wifi.
The current configuration of the home Wifi connection will be left as it is, and a virtual Wifi will be set up to be used as an access point.
This way, you can see the preview image when you are out of the house, and when you come back home, you will be connected to the Wifi, making it easy to work with.
We used this site as a reference.

By the way, since the OS used is Bullseye, the camera is controlled by the libcameta-still command.
I'm still not sure about this area, and I can't use RPi-Cam-Web-Interface yet... I wonder if I'm right...
If you have a legacy camera, using this app is the easiest and best way to use it.

Set up as soon as possible
If you follow the page you refer to, the work will be completed without any particular problem.
But well, as a note for myself, I will write down the brief flow of the process.
Check your MAC address.
First check your MAC address with the iw command.
If you already know it, this step is not necessary.
1iw dev
Configure Wifi interface to be created at startup
Create a rules file.
1sudo vi /etc/udev/rules.d/99-ap0.rules
Once created, fill in the following information.
Fill in the [MAC address] that you have just confirmed in the MAC address field.
1SUBSYSTEM=="ieee80211", ACTION=="add|change", ATTR{macaddress}=="[MAC address]", KERNEL=="phy0", \
2  RUN+="/sbin/iw phy phy0 interface add ap0 type __ap", \
3  RUN+="/bin/ip link set ap0 address [MAC address]"
Install hostapd and dnsmasq
1sudo apt install hostapd dnsmasq
dnsmasp configuration
Open the configuration file.
1sudo vi /etc/dnsmasq.conf
Add the following to the end of the file
1interface=ap0
2dhcp-range=192.168.249.50,192.168.249.150,255.255.255.0,12h
dhcdcd settings
Open the configuration file.
1sudo vi /etc/dhcpcd.conf
Add the following to the end of the file.
1interface ap0
2static ip_address=192.168.249.1/24
3nohook wpa_supplicant
Oh, and if you want to change your IP, please change it accordingly.
I'm doing it as it is (as long as I can connect).
hostapd configuration
Create a configuration file.
1sudo vi /etc/hostapd/hostapd.conf
The contents of the file should be as follows.
 1ctrl_interface=/var/run/hostapd
 2ctrl_interface_group=0
 3interface=ap0
 4driver=nl80211
 5ssid=Enter SSID of your choice
 6hw_mode=g
 7country_code=JP
 8channel=11
 9ieee80211d=1
10wmm_enabled=0
11macaddr_acl=0
12auth_algs=1
13wpa=2
14wpa_passphrase=Password used for connection
15wpa_key_mgmt=WPA-PSK
16rsn_pairwise=CCMP
Finally, set up the automatic startup.
1sudo systemctl unmask hostapd.service
2sudo systemctl enable hostapd.service
Done.
Wifi Enable
We did not do this process because we had already set up the system with Wifi enabled, but we will enable it if necessary.
Open the configuration file.
1sudo vi /etc/wpa_supplicant/wpa_supplicant.conf
Add the following.
1country=JP
Finally, enable Wifi with the following command.
1sudo rfkill unblock wifi
If you use Rasberry Pi Imager, you can install OS with Wifi enabled, so it is easier.

 Raspberry Pi
Once you have set up the last part, reboot and see if your smartphone's Wifi search shows the SSID you have set up.
This is a simple but effective way to set up an access point with your existing Wifi connection.
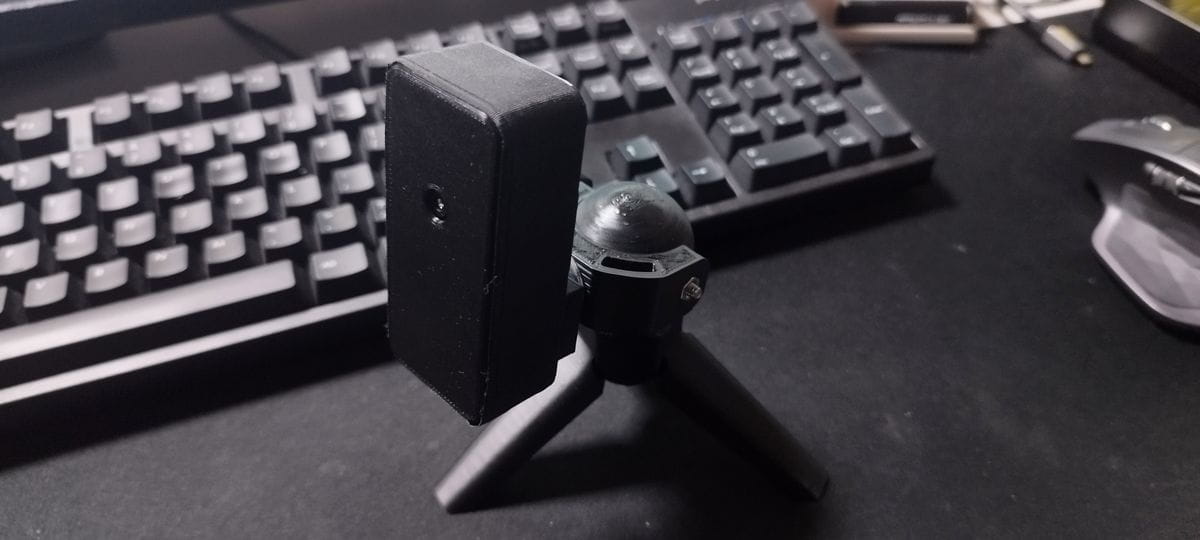
STL file used
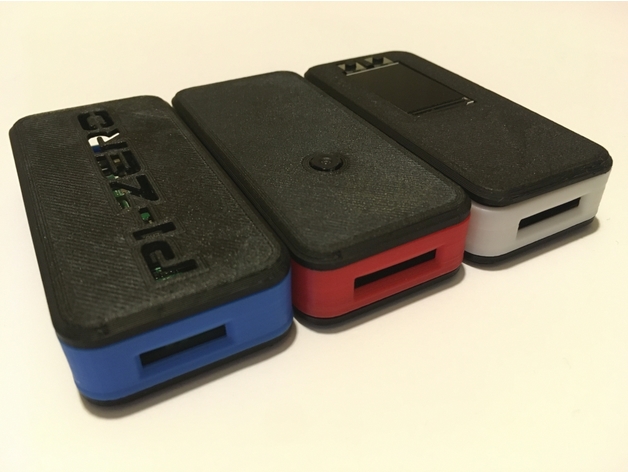

This is a case for the Raspberry Pi ZERO. There are no screw holes, and it does not snap into place, so I use this tape to surround the case.

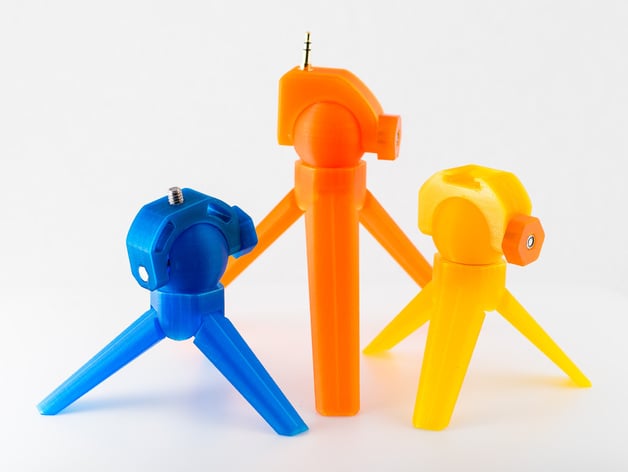
Data for a tripod.
This tripod is quite easy to use, although it requires a 1/4" screw in addition to the one I have output.
I have output the data for ABS, but it can also be used with SLR cameras.
However, there is a weight problem, so this is only if the tripod is light.
とりとめのないまとめ
ZERO2, because of its improved performance, is more stress-free than ZERO.
The power consumption has also increased, so ZERO2 may be better for some purposes, such as continuous operation time with the battery. (Even though it is a power-saving device, though.)
I would be happy if it becomes more common to buy ZERO in the future, because it is easy to use.