Free! Try MiniTool's ShadowMaker (free version), which does just that, from daily backup to SSD migration!
Overview
Select ShadowMaker for backup on Windows
Do you backup your PCs on a regular basis?
In my case, I think I am a person who keeps backups.
I use Git for my program code, etc., so I can commit and push my work to Gitlab.
The Git (Gitlab) that I push is backed up by running a shell script on the server side.
I also use rsync to sync the backup file to the local side just in case.
However, when I think about cases other than program code, I often Zip it up at some point and throw it on the NAS.
In other words, the parts that are not backed up automatically are rather appropriate.
Then why not write a batch process to automatically take backups?
That is a good argument, but it is quite cumbersome. What is troublesome is not so much the writing of the batch process, but its operation and management.
If the number of backup targets increases, it becomes necessary to write additional processes, and we tried MiniTool's backup software "ShadowMaker" this time in order to save as much trouble as possible.

As for MiniTool's software, we have tried "Partition Wizard" in the past, so we chose it because of its proven track record.
What you can do with ShadowMaker (free version)
I thought that the free version might be limited in what it can do, but it seems that the basic features are almost the same as the paid version.
For detailed differences from the paid version, please refer to here.
In my opinion.
- File Backup and Restore
- System Backup and Restore
- Disk Backup and Restore
- Scheduled Backups
I don't have anything special to say if this feature is available.
If I had to say something extravagant, I would say that it is a little inconvenient that the "Complete Backup Scheme" is not available.
I will write more about the differences in backups in this area later.
For now, our goal is to back up target folders on a regular basis !
I would like to leave the system backup and disk backup to you, as you will find many other articles on the subject if you search for them.
Speaking of which, I wrote about moving to SSD (system backup) in the article when I used Partition Wizard, so if you are interested, I recommend you to read that too.
ShadowMaker from installation to startup
I would like to go through the process of installing and starting the software as soon as possible.
First, download the installer from the official page.
Install
Double-click the downloaded file to launch it.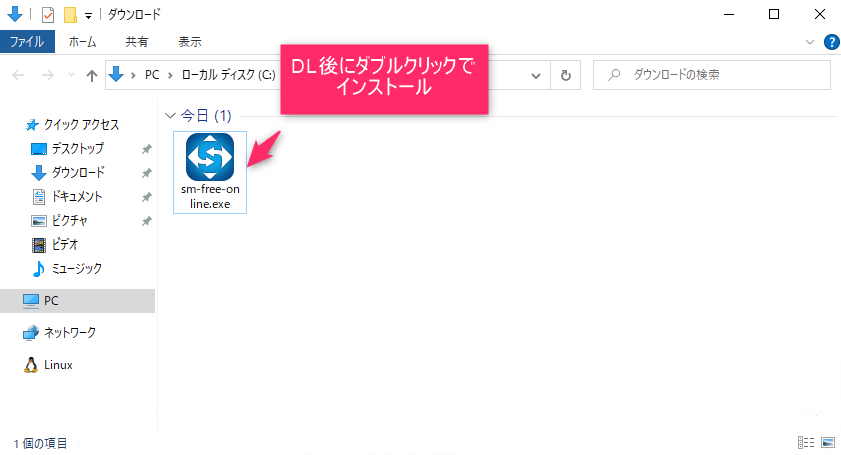
Click "Install Now" when the installation screen appears.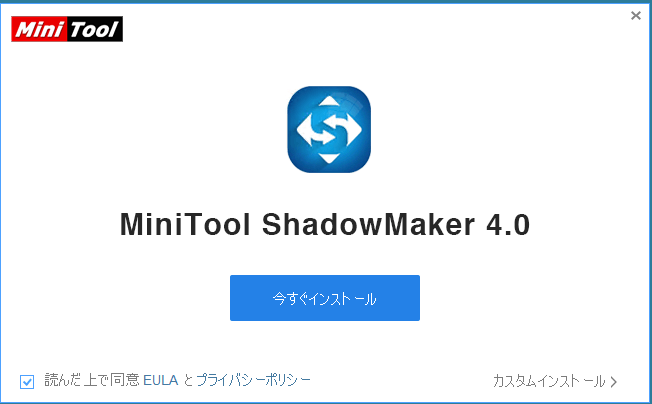
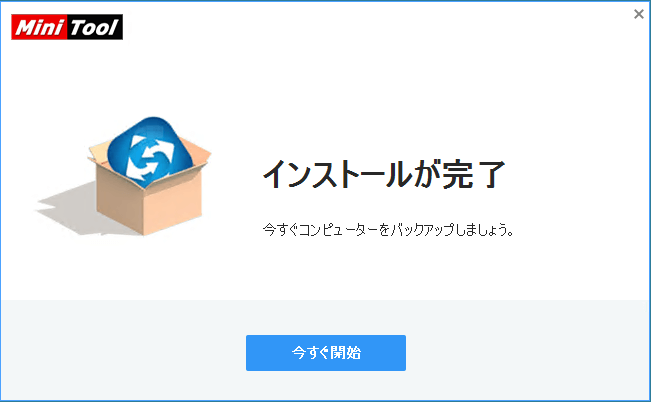
Installation will start, and after a while, the completion screen will be displayed.
Click "Install Now"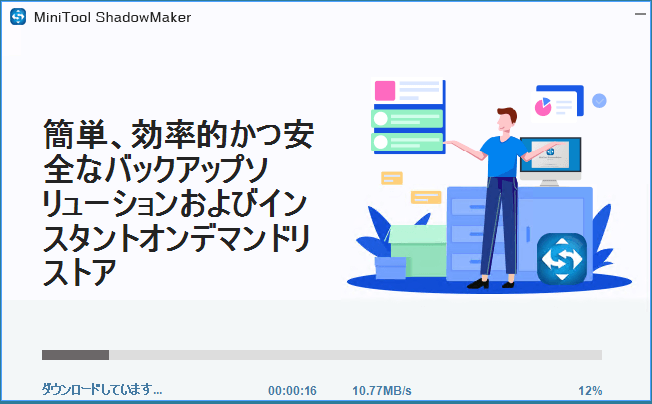
Click "Start Now" to start the program.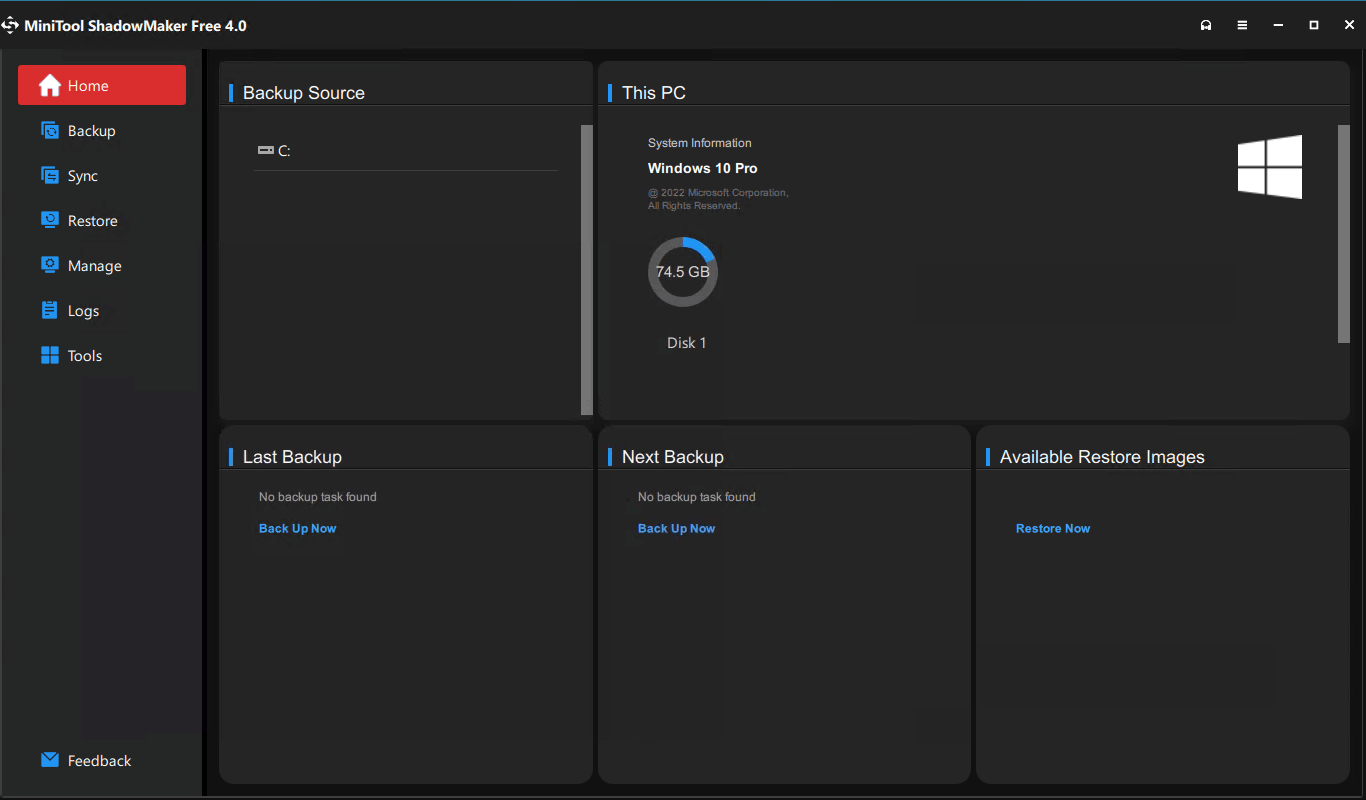
Create a backup schedule
Create a backup schedule setting.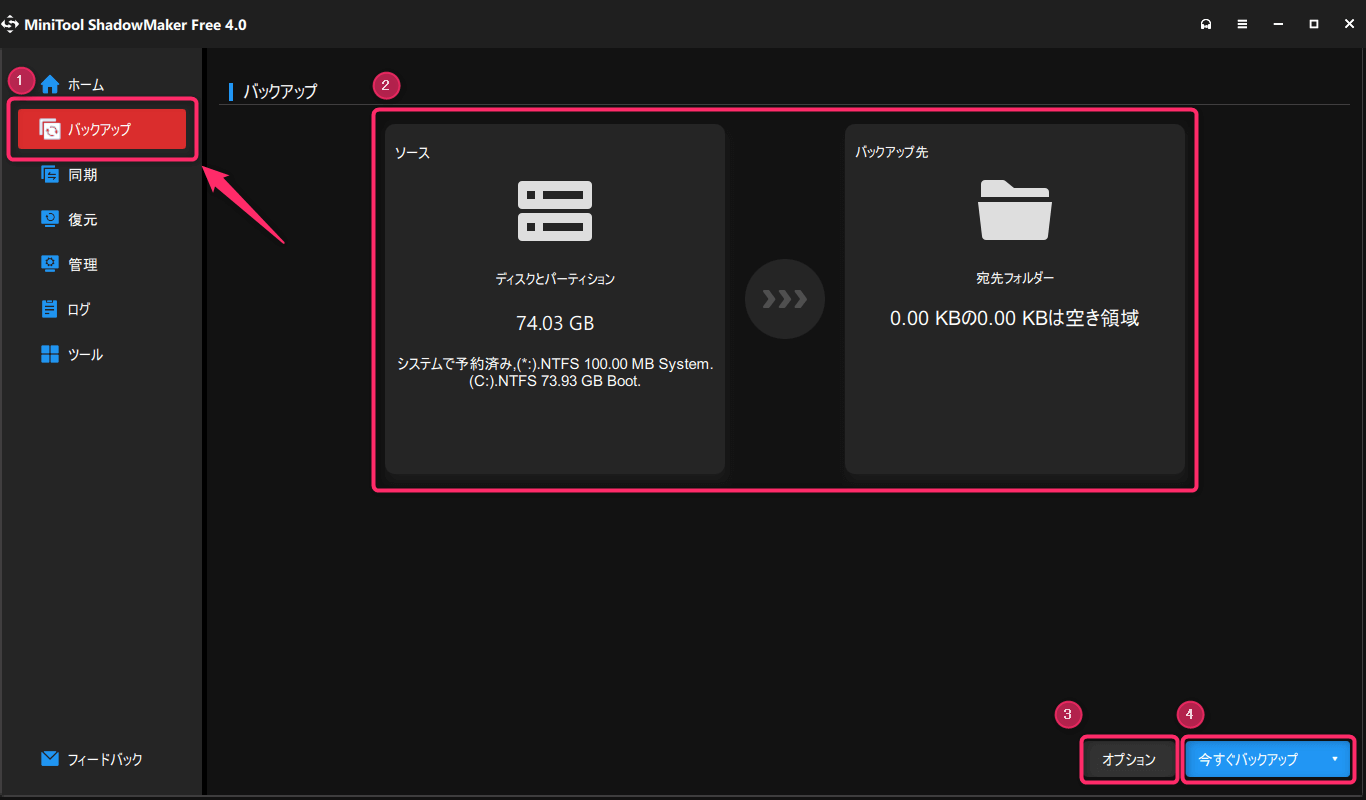
(1) Select "Backup" from the left menu to move to the screen for selecting the source (backup target) and backup destination.
(2) Select the source of the backup and the destination folder in the same way.
Select "Folders and Files" as the backup source, since we want to target a folder this time.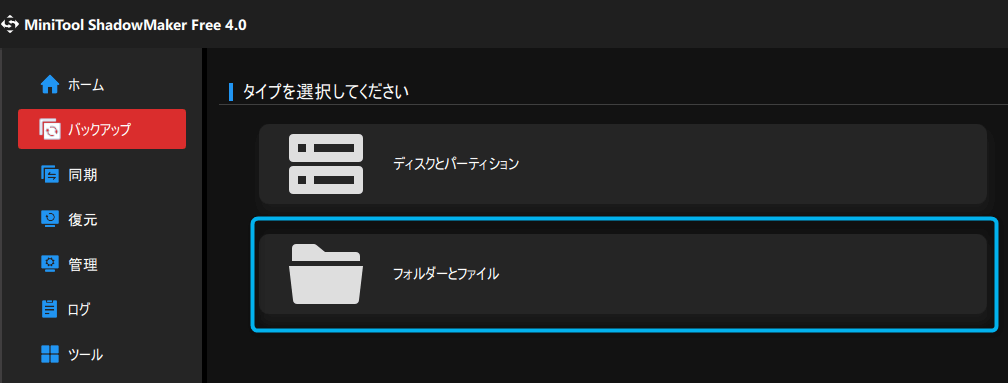
(3) Click on Options to see other settings.
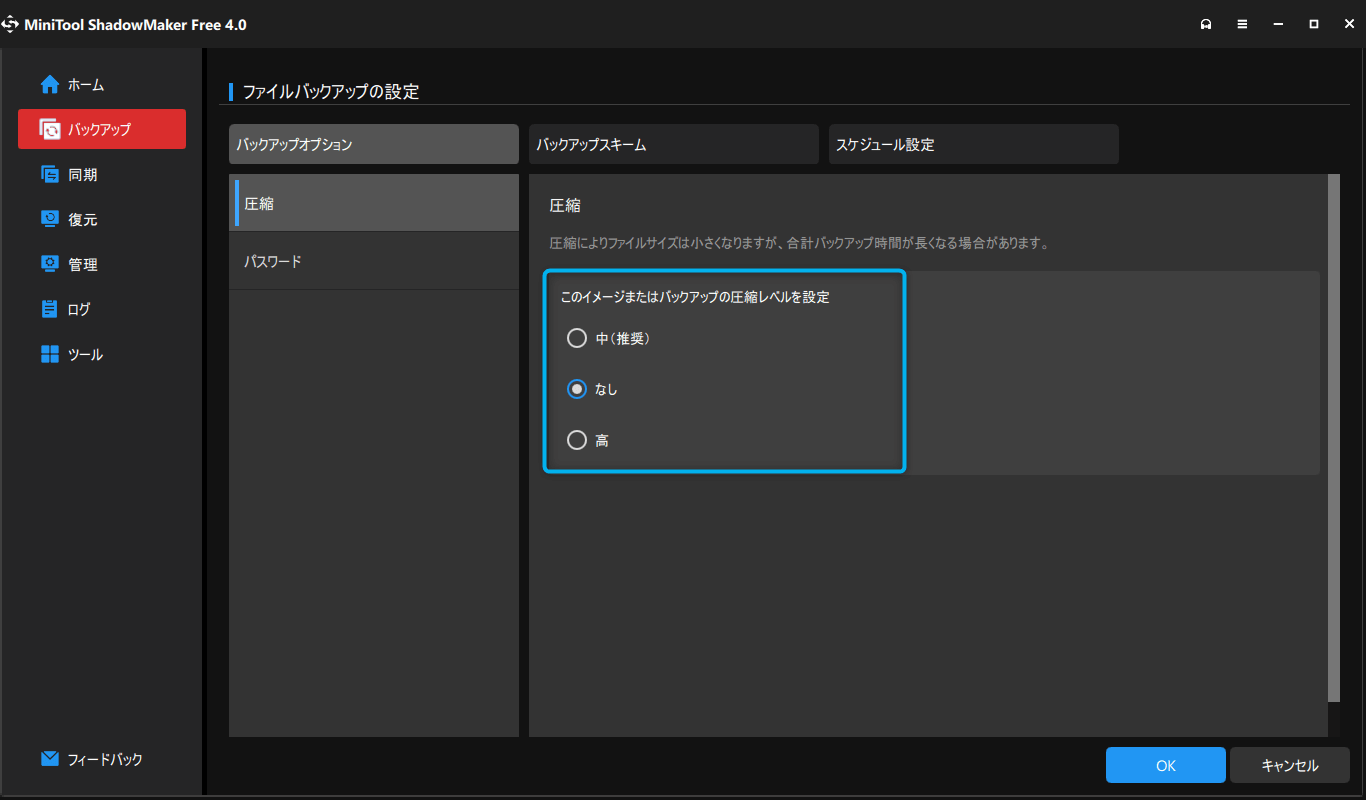
If you set the compression ratio to anything other than "None," the backup files will be compressed, which will save HDD space.
However, the time required for backup will increase because of the compression process.
You can also set a "password" if you want to protect your backup files with a password.
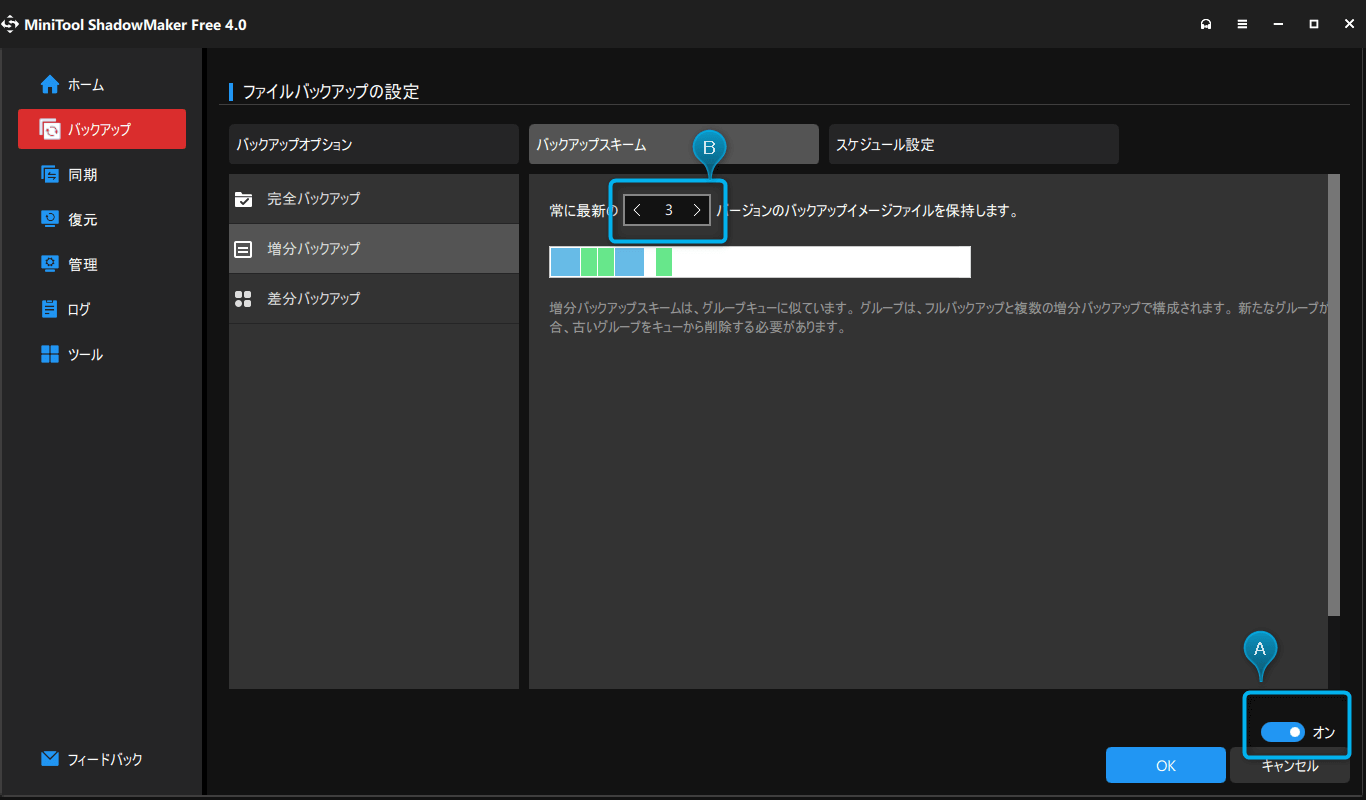
To do so, turn on the toggle button on "A" in the image and specify the number of versions on "B".
If the number of versions retained is set here, a full backup will be taken again when the retained version is exceeded and the old files will be deleted.
In the case of incremental backups, it is recommended to set the number of incremental backups to a moderate level, since a long incremental backup after a full backup increases the risk of restoration and the time required for restoration.
Unfortunately, the only backup method that can be scheduled is incremental backup in the free version.
However, differential and full backups are possible if done manually, so it is up to you to decide how you want to use it.
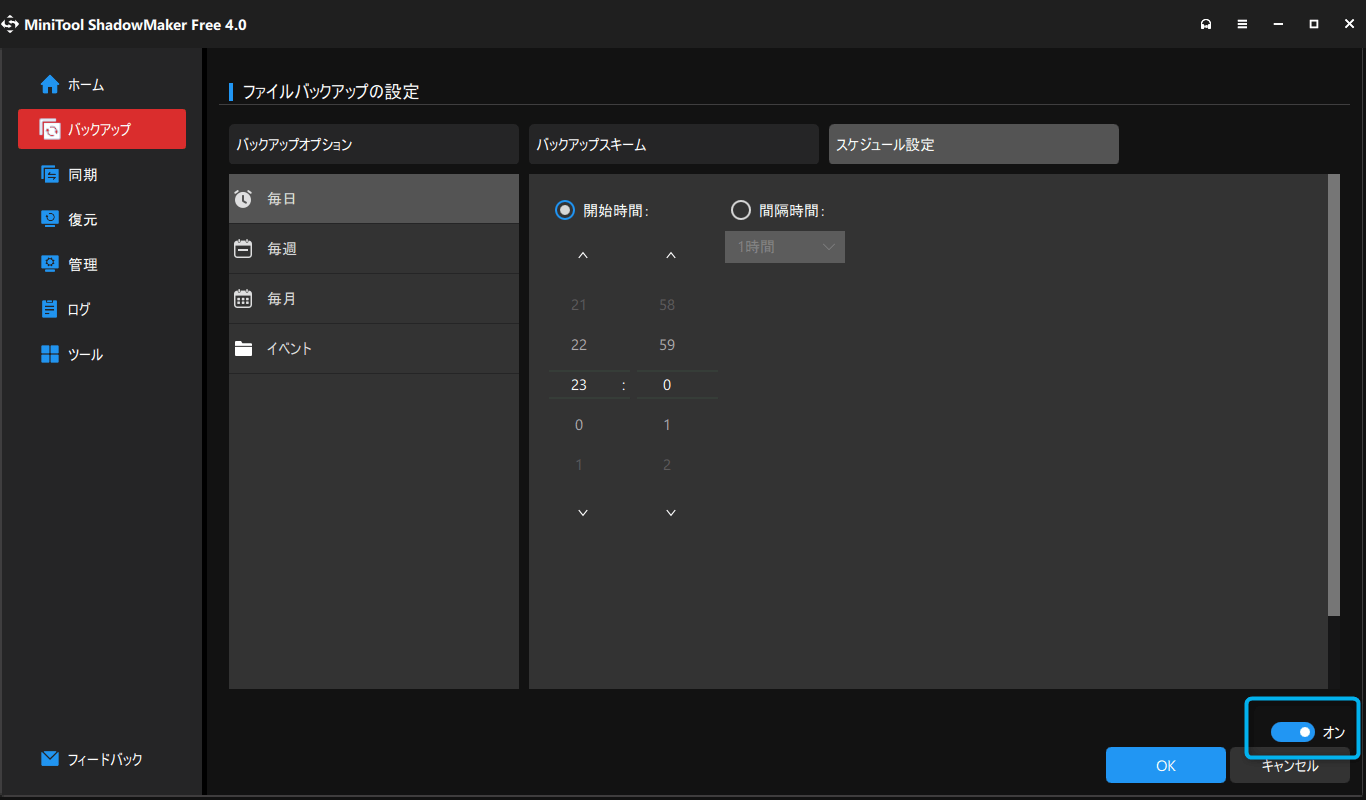
If you wish to use this feature, please turn on the toggle button before setting up a backup. Of course, you can also choose to backup manually without setting a schedule, so choose the method that best suits your backup needs.
When you have completed setting all options, click the "OK" button to return to the original screen.
(4) Click "Backup Now" to start backup.

This completes the backup setup. Very easy.
This time, I set the backup to be performed every day at 23:00.
I set the backup destination to the desktop because I also wanted to check the operation, but in reality, it is safer to specify a different physical location such as a NAS.
About each backup method
As mentioned above, for the regular backup of the target folder that was just performed, ShadowMaker (free version) only allows you to select the incremental backup method. If you wish to perform full backups or differential backups at specified times, you must purchase the paid version.
However, both differential and full backups can be performed manually, so depending on the backup target, the free version may be sufficient for some backups.
I don't understand the difference between each of the backup methods to begin with.
Indeed, it is difficult to understand what the differences are, so I will briefly summarize the differences.
Types of Backups
full backup
In common parlance, this is a whole backup. This is a backup of all target data.
This is the base point from which all data is backed up.
If the time and space required for backup is not an issue, you can choose to do a full backup every time.
differential backup
Backs up data that has been added or modified since the full backup.
This backup is recommended when data is updated infrequently.
While this cannot be specified in the backup scheme of ShadowMaker (free version), it is the recommended method for manual backup.
- The risk is lowered because only a full backup plus a differential backup of the latest version of the data is required for restoration.
- In addition to the above, the time required for restoration is also reduced.
- Since each backup is based on a full backup each time, the backup data increases each time.
- Backup time increases for the same reason as above.
incremental backup
Initially, the data that has been added or modified since the full backup is backed up.
From the next backup, the previous incremental backup data will be used as the base point.
This backup is recommended when data updates are frequent and backup is performed more than once a day.
- Since only additions and modifications made since the last backup are backed up, the data volume is small even if the number of backups is repeated.
- Backup time is reduced for the same reason as above.
- The risk of data corruption, etc. increases because all incremental backup files are required during restoration.
- The time required for restoration will also increase due to the increase in the number of files to be processed for the above reasons.
Summary of Backup Methods
| - | full backup | differential backup | incremental backup |
|---|---|---|---|
| Target data | All data | Additions and changes from full backup | Additions or changes since the last incremental backup |
| Backup data capacity | For all data | Additions and changes after each full backup | Only increments since last backup |
| Backup Time | For all data | 回数を重ねるたびに増加 | Only increments since last backup |
| Data required for restoration | full backup | Full backup + latest diff | Full backup + all incremental backup |
| Time required for restoration | - | somewhat below | larger portion |
Try to restore
Now that we have finished registering the backup schedule and have confirmed that the backup is successful, the next step is to restore.
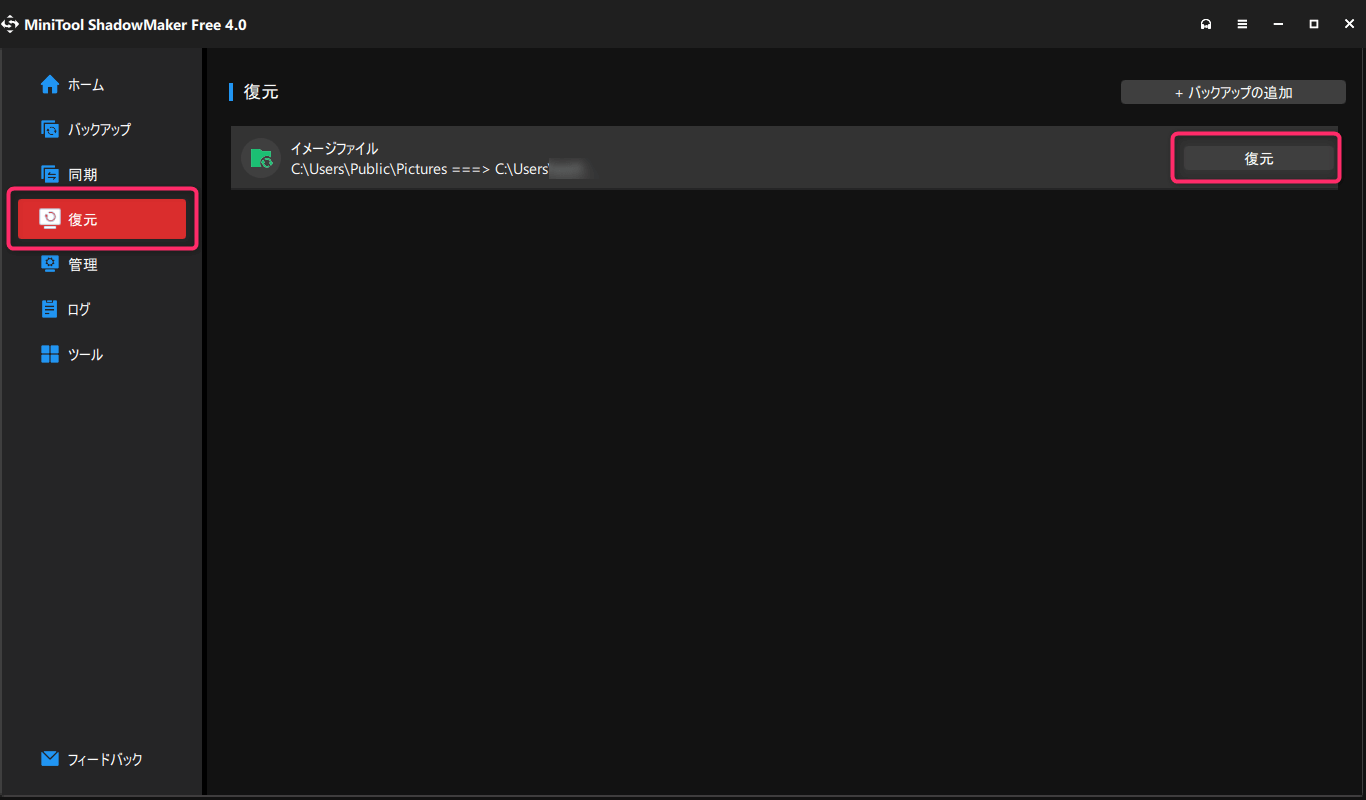
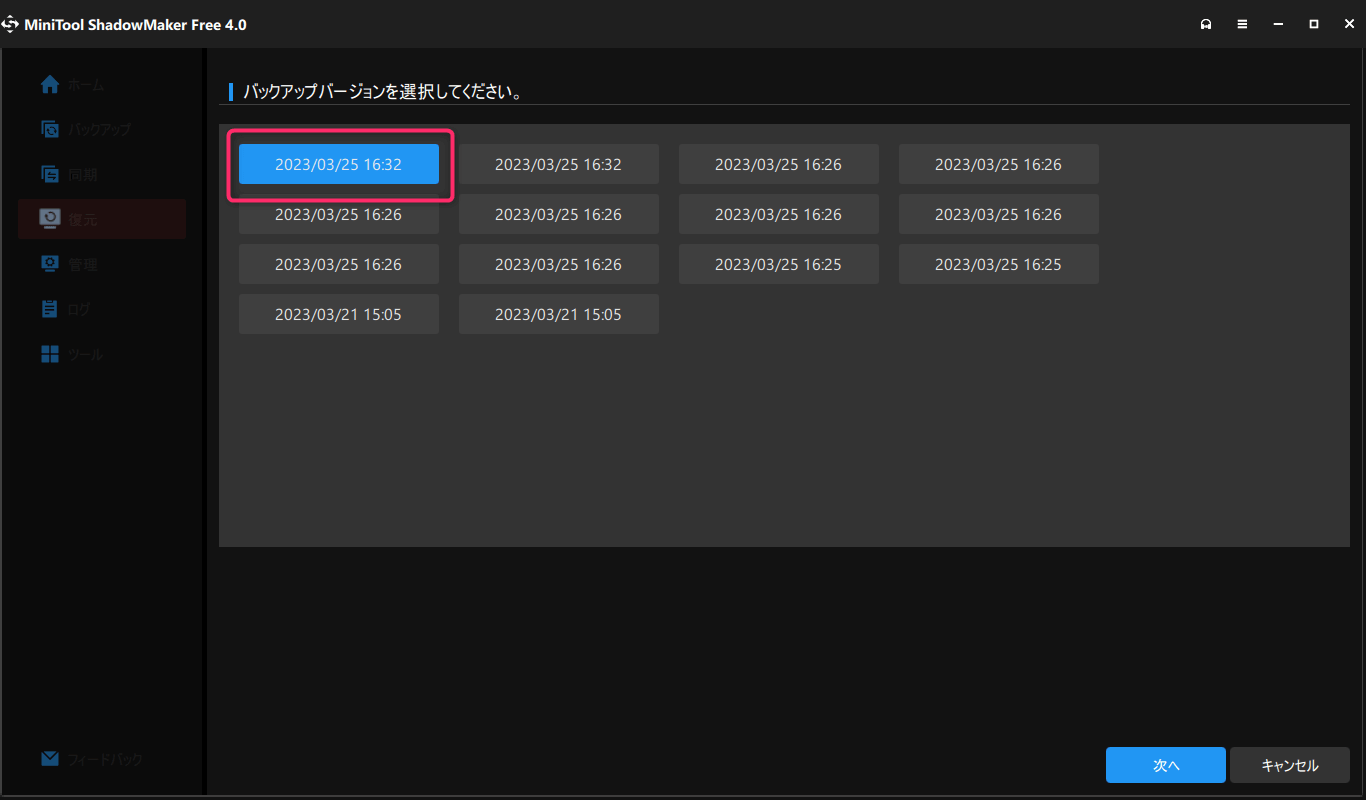
Select "Restore" from the menu on the left to display a list of target image files.
Click the "Restore" button for the displayed target image file.
Then, you will be prompted to select the backup date and time you wish to restore.
(In the image below, the same date and time are lined up, but this is a backup for operation check purposes, so don't worry about it.)
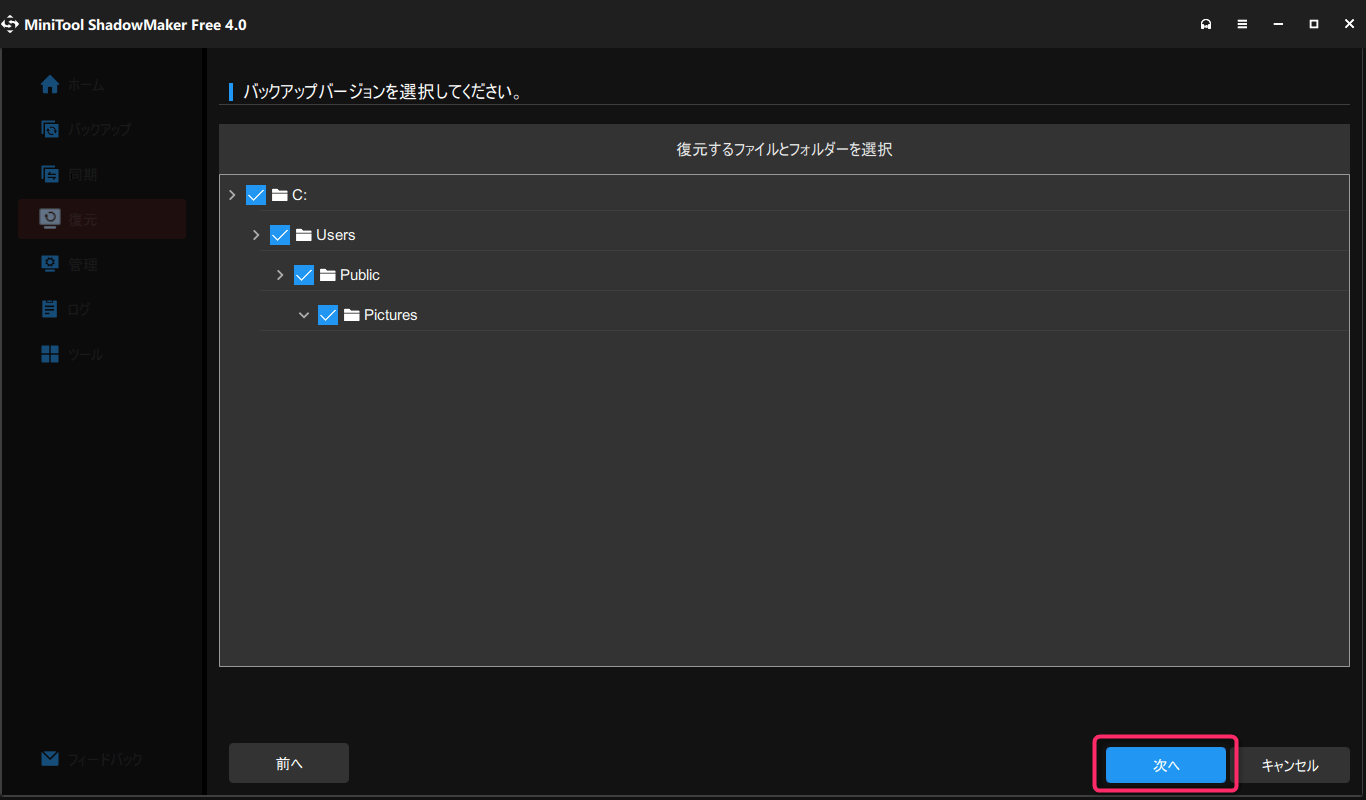
Next, select the files and folders to be restored.
Here you can select the files you wish to restore, and if there is data you do not need, uncheck the checkbox.
Finally, select the location to be restored and click the "Start" button.
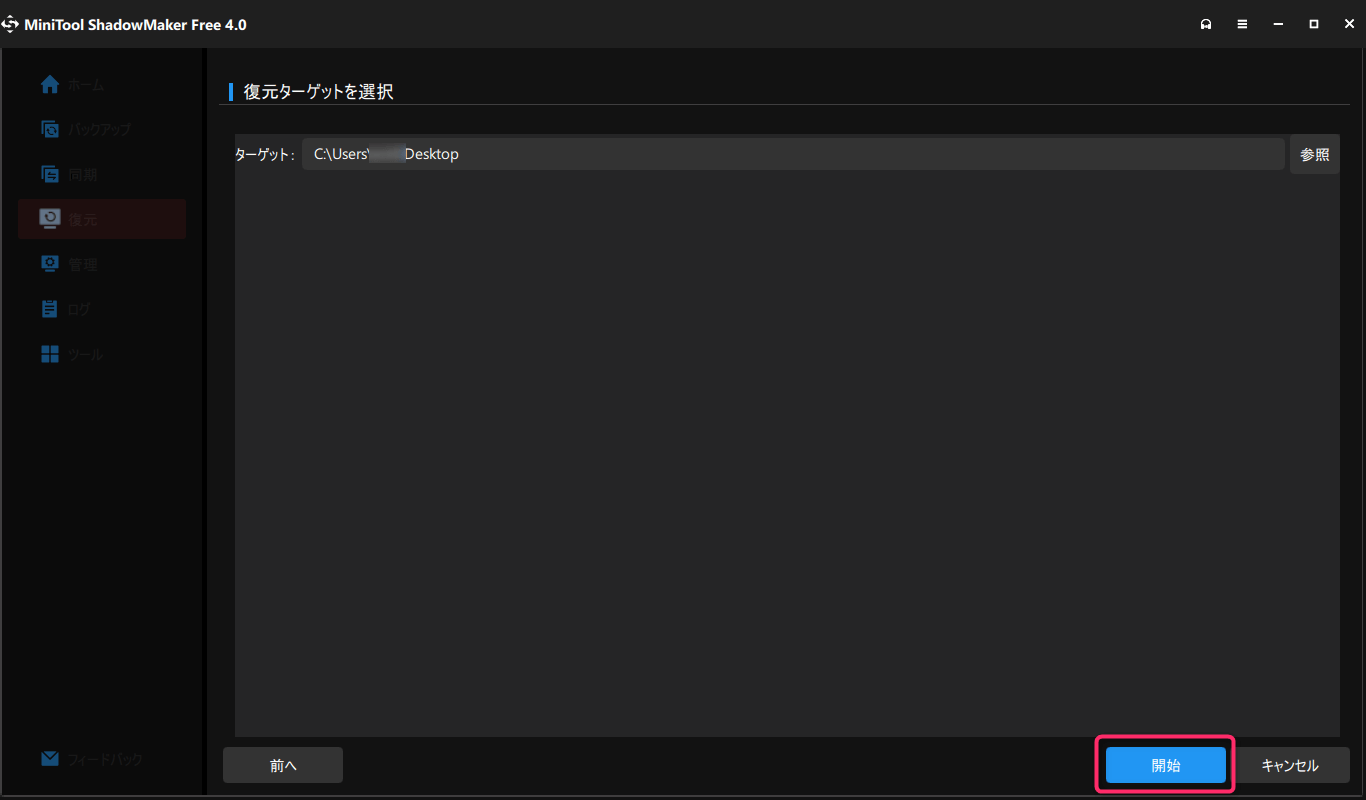
Yes, you are now done.
The file should have been restored to the specified location.
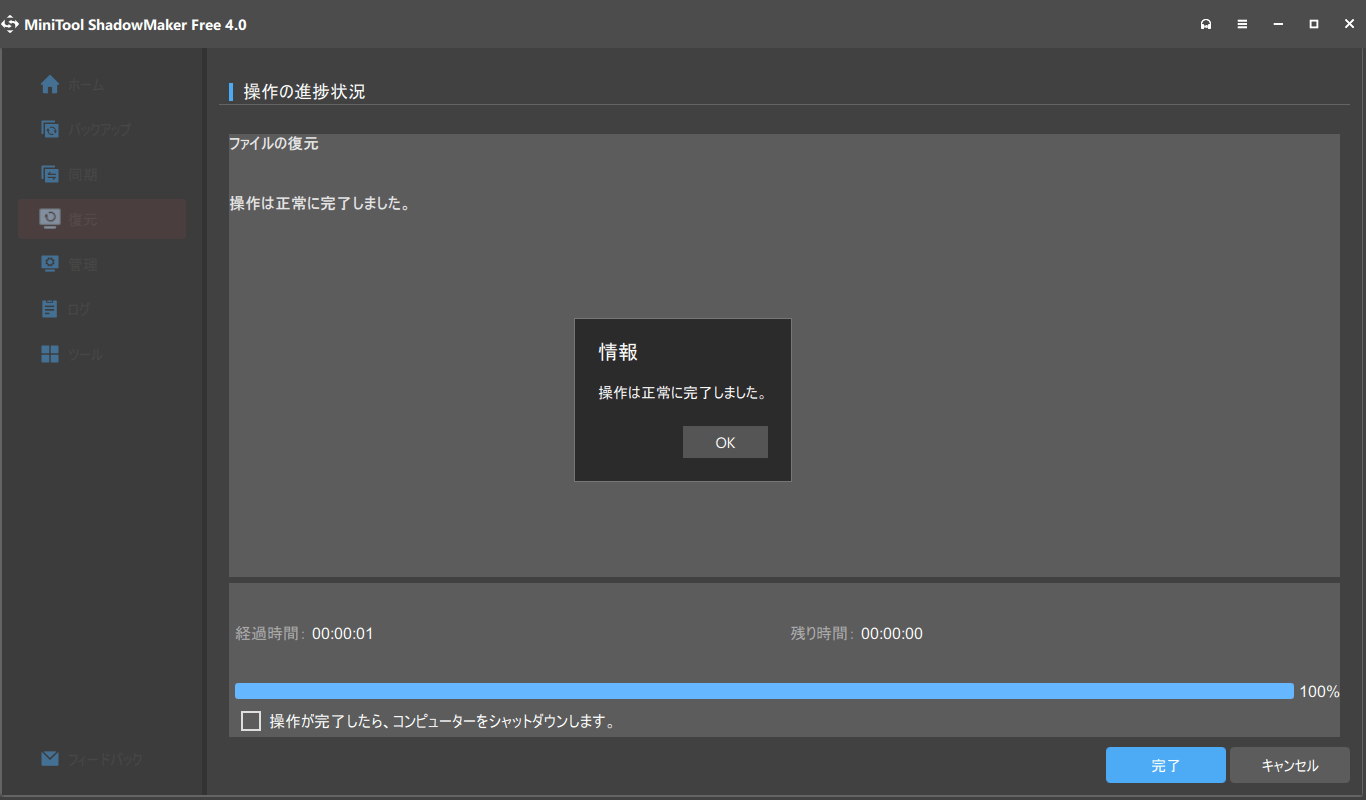
It's very easy to restore.
I think it is easy to use because it is easy to understand and operate when to go back to the backup.
I have tried everything from backup to restoration.
I think it is good to use this for backups on Windows because it is easy to manage backups.
There are other useful functions such as synchronization and disk cloning, so if I have a chance, I would like to try those as well.
とりとめのないまとめ
The main advantage of this folder backup is that it backs up the folders at a fixed time.
If you set up backups to occur at the same time, you don't have to be aware of anything.
It is also good to do backups in batch processing, but it tends to be complicated because of multiple files or because the schedule for each batch file may be forgotten.
If I can manage my backups with a single software, whether it is automatic or manual, the stress of managing them is alleviated.